
Latest Meta Stats
Statistics from the official in-game HoK Camp (as of 2026-08-14).
Official Ratings
Official ratings shown on the in-game hero detail screen.
Base Stats
Compare all heroes' base stats →Transcribed from the in-game hero status screen. Arcana bonuses are excluded.
Summoner Spells That Fit

The lifeline for heroes with no movement skill

For the player absorbing damage at the front
The reasoning for each is on the summoner spells page. You may only bring one per match, and the best choice shifts with the enemy draft.
Arcana Build That Fits
This role stands in lane for long stretches, so how much chip damage you can heal back decides how long you hold.
This is a role-wide recommendation, not one tuned for this hero specifically.
See every build on the Arcana page →First Skill to Level Up
Source: the official in-game HoK Camp (fetched 2026-08-14). What to level after this depends on the matchup.
Counters & Synergies




Countered-by and synergy picks are this site's own reading, based on each hero's kit. What the official app publishes is how often heroes are picked together (see "Frequently Paired With" below); it does not publish any rating of how well they match up.
Frequently Paired With



The figures are the "match rate" published by the official in-game HoK Camp: how often these heroes ended up on the same team (fetched 2026-08-14). It is not a win rate, so a higher number does not mean a stronger pairing.
Popular Item Builds
The order matches the in-game display. The win rate covers matches played with that build, so player skill is mixed in. Taken on 2026-08-25.
Skills

Passive Skill: Slack Off a Lil Bit
Attacking, taking damage, or moving interrupts this effect. She won't slack off in Serious State.
Using a different skill combo within 3s of another boosts its effect by 25%.
| Details | Lvl 1 | Lvl 15 |
|---|---|---|
Health Recovery | 110 | 220 |
Strength Recovery | 25% | 50% |

Skill 1: Whatever (I)
Exploit Weakness: When using Whatever (I) again quickly after, she will leap into the air and deliver a powerful strike, dealing 400 (400 + 125% extra physical attack) physical damage to enemies within range and extra physical damage equal to 10% of the target's Health, as well as launching them for 1s.
Deals 50% extra damage to enemies in the center of the skill.
Mayene takes 25% less damage while using the skill.
Feint to Retreat: Mayene delivers a smooth combo of strikes, starting with 3 punches that deal 200 (200 + 70% extra physical attack) physical damage each, followed by a knee strike that deals 200 (200 + 70% extra physical attack) physical damage while pushing the target backward slightly (not a crowd control effect). She also recovers 200 (200 + 5% extra Health) Health.
This skill costs 1 Punch Strength. She recovers 1 Punch Strength every 8.5s (affected by Cooldown Reduction), and can stock up to 2 bars at a time.
| Details | Lvl 1 | Lvl 2 | Lvl 3 | Lvl 4 | Lvl 5 | Lvl 6 |
|---|---|---|---|---|---|---|
Base Damage | 200 | 240 | 280 | 320 | 360 | 400 |
Cooldown | 8 | 7.6 | 7.2 | 6.8 | 6.4 | 6 |
Skill 2: Whatever (II)
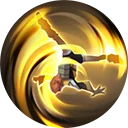
Flee Danger: When using Whatever (II) again quickly after, she delivers a flying kick to the enemy, dealing 500 (500 + 150% extra physical attack) physical damage and recovering 200 (200 + 5% extra Health) Health. She then somersaults into the air, during which she has crowd control immunity and 25% damage reduction, and recovers 300 (300 + 5% extra Health) Health.
Defend by Attacking: When using Whatever (I) quickly after, she blinks behind the enemy and delivers a spinning kick, knocking back the target and dealing 350 (350 + 110% extra physical attack) (+ 15% of the target's lost Health) physical damage.
If the target is defeated, she recovers 300 (300 + 5% extra Health) Health, as well as 50% Punch and Kick Strength. These effects are doubled if she defeats an enemy hero.
This skill costs 1 Kick Strength. She recovers 1 Kick Strength every 8.5s (affected by Cooldown Reduction), and can stock up to 2 bars at a time.
| Details | Lvl 1 | Lvl 2 | Lvl 3 | Lvl 4 | Lvl 5 | Lvl 6 |
|---|---|---|---|---|---|---|
Stock Interval | 8.5 | 8.2 | 7.9 | 7.6 | 7.3 | 7 |
Base Damage | 180 | 216 | 252 | 288 | 324 | 360 |
Cooldown | 8 | 7.6 | 7.2 | 6.8 | 6.4 | 6 |

Skill 3: Get Serious
Upon entering the Serious State, she recovers 1 Punch Strength and Kick Strength, and max Strength is increased to 3 bars each. The Serious State lasts for 10s, during which she gains 15% Movement Speed, and any slowing effect inflicted on her is reduced by 50%.
| Details | Lvl 1 | Lvl 2 | Lvl 3 |
|---|---|---|---|
Cooldown | 60 | 54 | 48 |
Base Damage | 360 | 540 | 720 |
MSPD Increase | 15% | 22.5% | 30% |
Strategy Guide
An eccentric brawler juggling two stamina gauges — slack off and she literally sits down to snack. Weave her cartwheel dodge and pull correctly and her flurries take over the fight.
Best for: Players who see resource management as a puzzle, not a chore — and read 'very hard' as an invitation.
The first cast drags the target in front of her, so you set the spacing yourself. The second adds physical damage equal to 10% of the target's max Health at Lvl 1, and enemies caught dead center take another 50%. She also takes 25% less damage during the strike at Lvl 1, so you can push through the counterattack.
The kick adds physical damage equal to 15% of the target's lost Health, so it scales with how much you have already chipped off. A takedown restores 300 Health at Lvl 1 plus 50% Strength, doubled when the target is an enemy hero. That refund is what reloads the next combo.
Entering the Serious State refunds 1 bar each of Punch and Kick Strength and raises the cap to 3. Using a different combo within 3s of the previous one boosts its effect by 25%, so closing with 2 → 2 and then launching with 1 → 1 lines up cleanly. It runs 10s, and once it ends her output thins out fast, so watch the timer before overextending.
These combos are not official data. They are this site's own write-up, built only from the skill data transcribed from the in-game display; nothing that the skill text does not state is included.
- •Four derivations cover engages, sustain, defense, and executions
- •Super armor and healing mid-combo make her 1v1 among the best in the game
- •The Ultimate's instant charge refund unlocks explosive teamfight chains
- •Takedown energy refunds let momentum turn her nearly unstoppable
- •Useless with empty gauges — charge accounting never stops
- •Split-second derivation choices back up her Very Hard difficulty rating
- •The Passive's lazy healing shuts off in combat, leaving mid-brawl sustain thin
- •The window right after serious mode ends is where she gets punished
In a clash-lane 1v1, Mayene is about as scary as it gets. From level 2, with Skill 1 and Skill 2 online, the derivation combos put your opponent in a guessing game they cannot win. Default to Skill 1 → Skill 2 for the punch flurry and its healing to win repeated trades; when they back off, switch to Skill 2 → Skill 1, teleporting behind them for bonus damage equal to 15% of their missing HP. Fist and Leg charges refill one every 8.5 seconds, so the one house rule is: after dumping both, take half a step back and don't eat the counter-swing. In quiet moments, let the Passive kick in — she sits down, snacks, and heals.
Once the lane is broken, spend minutes 8 to 13 split-pushing a side lane as bait. Whoever comes to collect you eats Skill 2 → Skill 2: the flying kick's super armor, damage reduction, and healing let you tank the attempt outright, and against two or fewer pursuers it often flips into a kill. One player bending multiple enemies around her while the team takes the Tyrant or towers — that is the Mayene win condition. She is helpless if jumped at zero charges, so make checking for two full gauges before every fight a reflex.
In late-game teamfights, cast the Ultimate first, not last. Its serious mode instantly refunds one Fist and one Leg charge and raises the cap to three, letting you chain derivations without pausing for breath. Hunt the backline: flank, lift them with Skill 1 → Skill 1, then finish with Skill 2 → Skill 1's missing-HP bonus. Takedowns with that finisher refund 50% energy (doubled for hero kills), so every kill reloads the next combo. When the 10-second window closes, your output falls off a cliff — overstaying is the one unforgivable sin.
Hold the flank and wait for the enemy's CC to be aimed at someone else. Enter with Skill 2 → Skill 2 — super armor carries you straight through their counters. On landing, refill with the Ultimate and pick the derivation the moment demands: Skill 1 → Skill 1 to lift, Skill 1 → Skill 2 to sustain, Skill 2 → Skill 1 to execute. And honestly, the moment you stop running fixed sequences — reading "they're retreating: 2 into 1" and "they're standing their ground: 1 into 2" on reaction — is the moment Mayene actually begins.
Other Clash Lane Heroes








Stats: official HoK Camp, as of 2026-08-14
Spotted an error on this page? Email us. Naming the section, the correct value, and how you verified it makes the fix faster.
Report an error on this page